Sunday, 23 June 2013

Review: b.liv by Cellnique

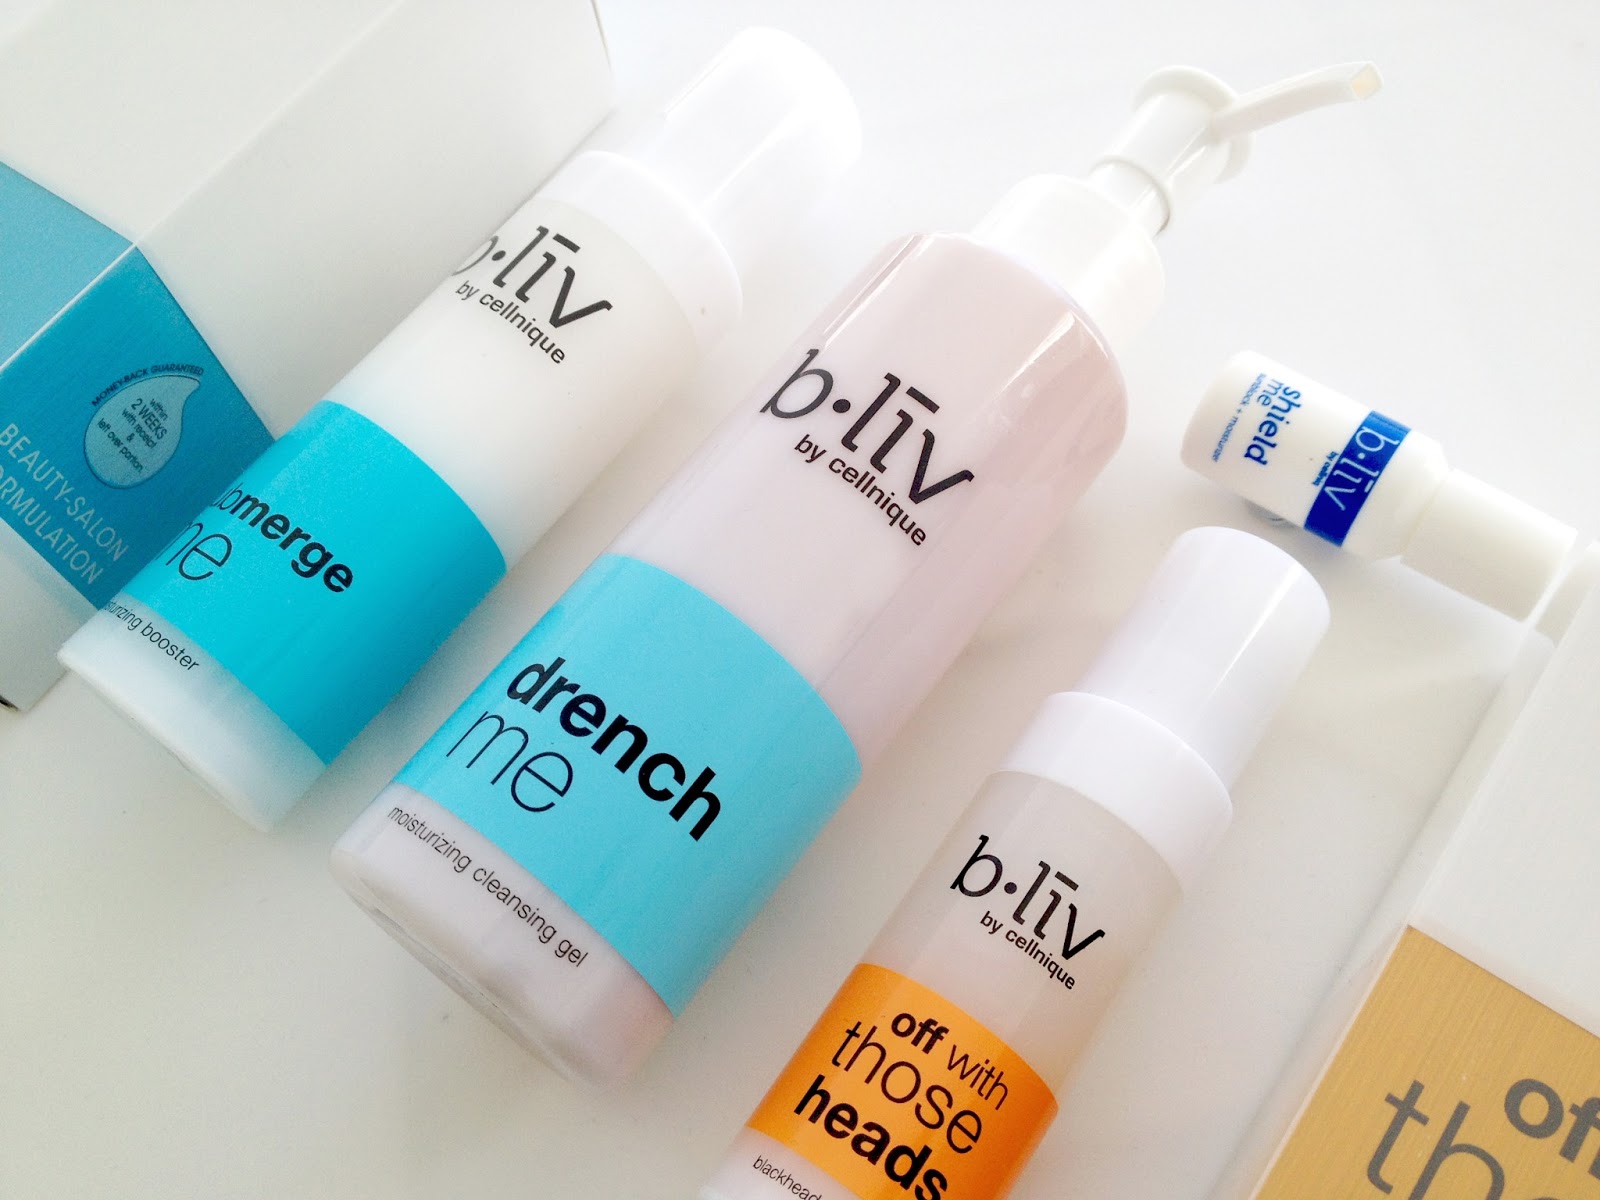
Winter is here and we all know how much it can bring havoc to our skin- and our summer skincare routine just won't cut it! I've been lucky enough to try a few products from b.liv by Cellnique, two of them being products from their dry/dehydration range and another from their blackheads range. Hydration is definitely what my skin needs in the cold Melbourne weather, brrr!


b.liv is a sister company of Cellnique, a brand from South East Asia whose expertise is in problematic skin, be it dryness, sensitivity or acne prone skin. The products couldn't have arrived at a better time, right at the beginning of winter and when my skin wasn't at its best.

b.liv drench me moisturising cleansing gel


b.liv drench me- Moisturising cleansing gel 130mL $25
The drench me product is a cleanser that claims to cleanse to remove impurities while hydrating the skin at the same time. I have the terrible habit of not cleansing- every single cleanser I have ever used made my skin tight, dry and flaky which is not the look I am after! Sceptical that a cleanser could be moisturising, I gave this a go. Love the subtle fresh scent that is from the seaweed, aloe vera and green tea extracts and the gel was surprisingly light. The moment of truth- did it make my skin dry? Absolutely not. I find it enjoyable using this cleanser, however I have not seen any visible improvements in my skin while using it besides being moisturising.

b.liv submerge me moisturising booster

b.liv submerge me- Moisturising booster 45mL $49
I was the most excited about trying the moisturiser because, well, I just love moisturisers! Everything described about submerge me was what I needed- deep moisture penetration, retains and replenishes moisture, brightens dull complexions and calms skin irritations. Normally hydrating moisturisers are thick and slightly greasy but submerge me was unexpectedly light and gel-like. It was so easy to apply and had no greasy residue at all with was a nice difference to the thick moisturisers I have been using of late. I found that the moisturiser wasn't as hydrating as it claimed to be- however for its light texture, its moisturising capabilities were absolutely brilliant.
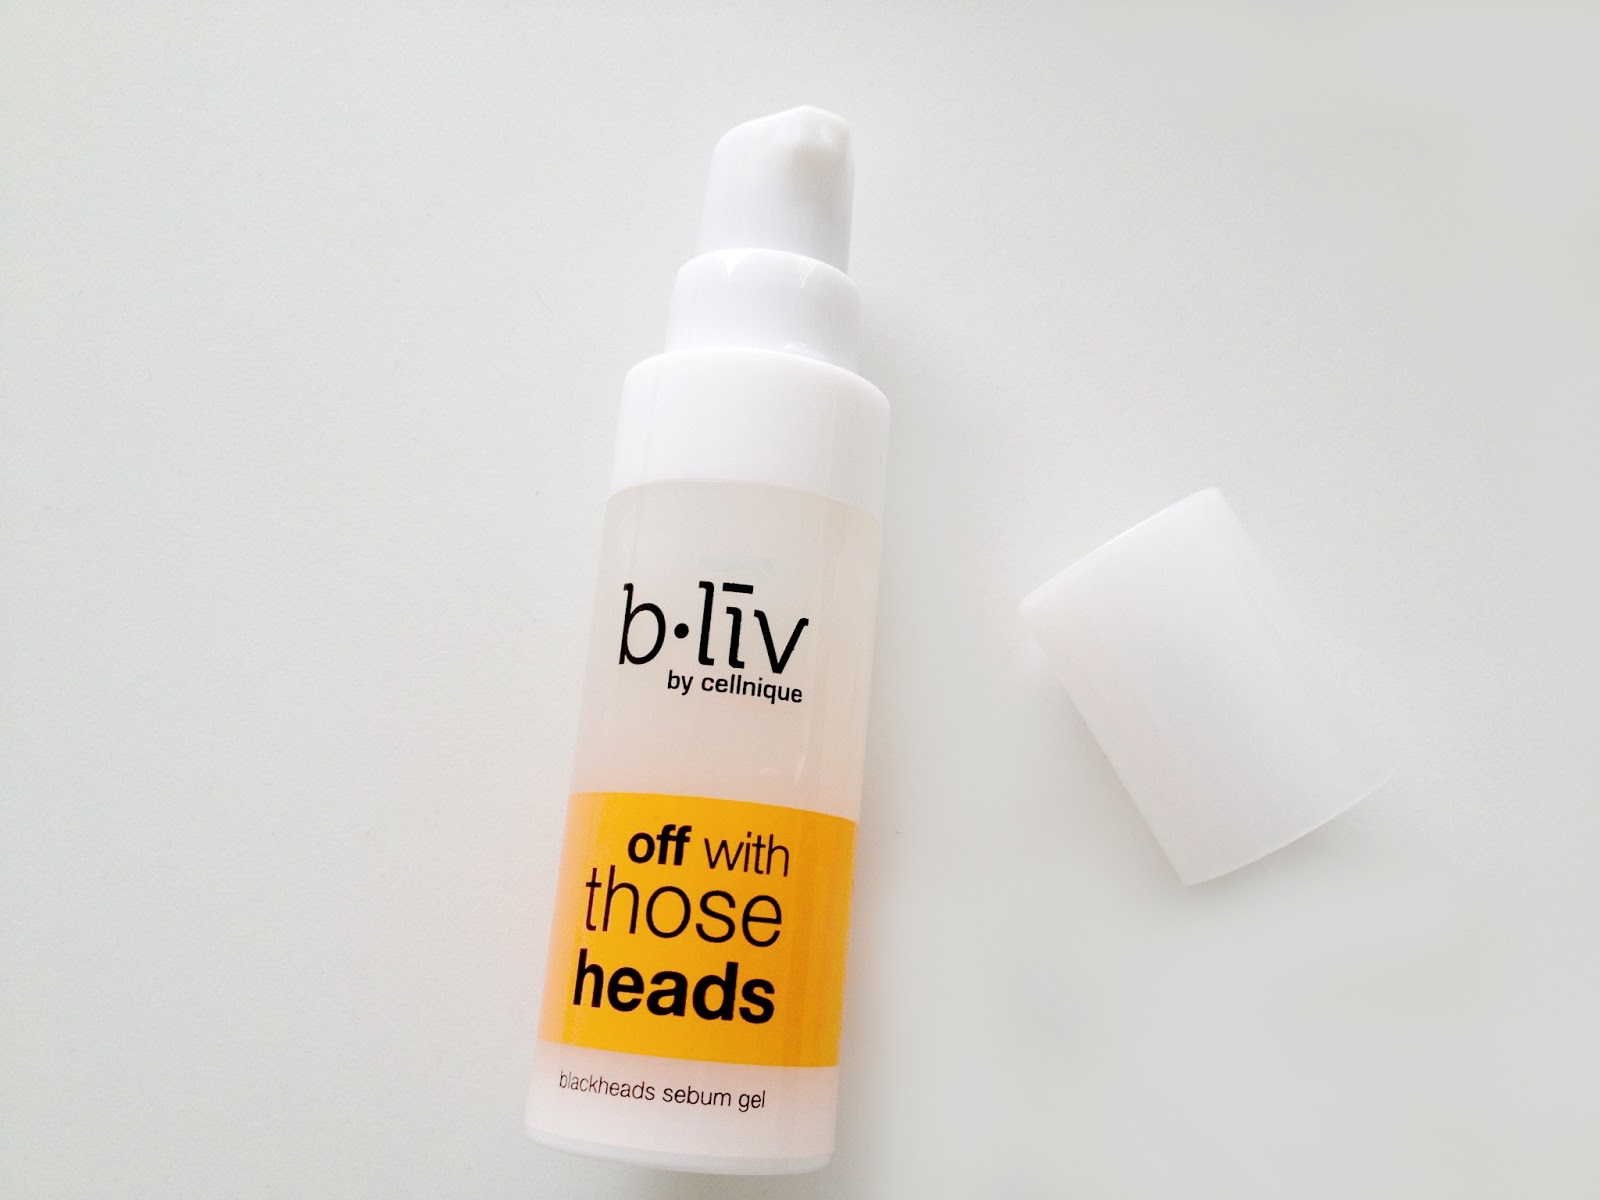

b.liv off with those heads- Blackheads sebum gel 30mL $49 
I've always had a problem with awful whiteheads and blackheads around and on my nose, and never really did much about them in terms of products, however I could pick them out using a pointed tweezer. off with those heads initially wasn't a product I was enthused about, as I never believe claims by blackhead removing skincare. b.liv describes its blackhead sebum gel to be able to remove blackheads and whiteheads, control excessive oil secretion and unclog pores- all in 14 days! After reading Candice's review on off with those heads and seeing her amazing results, I rushed out to try mine. The results were fantastic, and I have no whiteheads anymore!


 I'll let the photos speak for themselves! off with those heads is the most impressive product out of the three that I received, and I highly recommend it for those prone to blackheads and whiteheads, as well as clogged pores.

L-R: b.liv submerge me moisturiser, b.liv off with those heads sebum gel

Overall I am impressed with the b.liv products I have tried and am interested in trying the rest of their products, especially their masks which I have read many praises for. I have a promotional code BLG30A which gives you a 30% discount on b.liv products which you can buy on their online store, valid to the 30th of June! They are also giving away free samples here but I think they have ran out, but definitely pop your email there so they can contact you once the next round of samples is available.

Are you interested in trying b.liv by Cellnique's products?

Monday, 27 May 2013

Review: Rimmel Stay Matte Pressed Powder


I have to say, I'm quite the sheep when it comes to makeup. Countless praises of a product time after time makes me want it. Seeing how popular it is, I just want a taste of it, and see how great it is. So here is the Rimmel Stay Matte Pressed Powder in Translucent. After dabbling with a cheap Ulta3 Loose Powder (which actually isn't extraordinarily cheap considering it retails for $7.95 but I managed to nab for $3) which wasn't all too bad except that the shade I had gotten was too dark, I wanted a translucent pressed powder which would be easier to apply. With a 25% off sale on ASOS a while back, I managed to purchase the famous Stay Matte Pressed Powder for a mere $5.

L-R: Rimmel Stay Matte Pressed Powder in Translucent, Real Techniques Powder Brush

Packaging is simple, cheap plastic with a lid that doesn't stay on too well- this is definitely not travel friendly unless you wrap a rubber band around it to secure it. However I'm not too fussed as I don't travel with pressed powder as I don't tend to become oily throughout the day. I probably just purchased this product for curiosity's sake, however I liked the idea of setting face makeup and mattifying around the upper nose area where my glasses sit, as they tend to slide down.


Even though touted as a translucent powder, the Rimmel Stay Matte Pressed Powder appears to have a hint of colour- which will show up if you go super heavy with application (and I mean very heavy!). However with a normal swipe you pick up the perfect amount of product which can be applied very easily and is translucent. This product claims to provide up to 5 hours of natural shine control and to minimise the appearance of pores. This pressed powder definitely mattifies but since I don't have visible pores, I can't comment on the latter.


I love using the Rimmel Stay Matte Pressed Powder with my Real Techniques Powder Brush which applies the pressed powder like a charm, the softness of the brush is just divine! I'll definitely recommend Real Techniques for anyone who wants to purchase any makeup brushes- their quality is impeccable and are so soft. 


For anyone wanting to try a translucent powder, definitely give the Rimmel Stay Matte Pressed Powder a go, seeing as it it very affordable (retailing for $12.95 but is constantly on sale). They do come in a variety of shades but I'd recommend the translucent one for those who are too lazy to select their shade!

Have you tried the Rimmel Stay Matte Pressed Powder? What do you think of it?


Saturday, 11 May 2013

My experience at Rare Earth Hair Prahran

I'd never really been someone who splurged on hair cuts or anything hair related really- a quick and cheap $15 cut from a hairdresser who yells across the salon in various Asian languages would be what I settle on once a year. As of late, my flat and lacking in volume hair has been rather boring and I just wanted some volume! What great timing that I was offered a complimentary style-cut and blow wave from Rare Earth Hair Prahran (Melbourne), I was so excited!

How stylish do these chairs look?
After university one day, I popped down to the salon not knowing what to expect. What a huge change from the hair salons I am used to going to! It was beautifully furnished and had a very relaxed and comfortable atmosphere. The staff were extremely friendly and I met the owner Donna and a lovely lady Amy who was going to do my hair that day. On welcoming I was offered a choice of complimentary drinks which I thought was so nice- all the little things count!


 Before we get started, Amy gives me a head, neck and shoulder massage and uses a really calming aromatic oil- I was too relaxed to remember what it smelled like! My hair was washed and treated with AVEDA products which are naturally derived, and smelled amazing- I nearly fell asleep during it all! I haven't felt so pampered before, and definitely very different to my other salon experiences where they would start snipping before you're even sure of what you want!


 I asked for some more volume to my hair and for the length to be shortened- I find that shorter hair suits me better. Amy decided to do a layered hairstyle called the "Rockstar" that she learnt in Italy on me. I was looking forward to seeing the results!


I'm not sure what I am laughing hysterically about in the picture above, but it was nice chatting to Amy and finding out she was from Chicago in the US! A very nice blowdry and a few touch ups later, the whole experience was finished and I was so happy with the result. I have been so used to being so dissatisfied with my hair post haircut (all they want to do at budget places is to get it over and done with so they can move onto their next client!). My hair was so soft afterwards, and it was more bouncy and voluminised- just what I wanted. Unfortunately my "after" pictures at the salon didn't turn out very well, but I do have a picture from last night of my hair. And yes, please excuse that I am on public transport in both the pictures!

Before
After
 It was such a great experience and I loved every second of it! If you are around Melbourne and want to have a try at Rare Earth Hair, it is in Prahran which is very easy to get to from the city. New clients can take advantage of a $20 voucher to use on their first visit too which is a great offer. After this visit, I don't think I could ever go back to my budget haircuts anymore and nevertheless, I'll be happy to return!

What experiences have you had at hair salons?


Sunday, 28 April 2013

Review: Shu Uemura Hard Formula Eyebrow Pencil in Stone Gray


The day has come where I have decided to splurge on an eyebrow pencil! I have been in an eyebrow rut for sometime now- I have been trying to find the perfect brow products but I just never seemed to find anything that worked. My Essence Eyebrow Designer in Brown was a complete wrong colour match, and this the problem with every other drugstore brow pencil you can name- all the brown shades had a red undertone which looked odd with my hair. A stint with the MUA Brow Kit was also a wrong colour match, as much as I wanted to like the kit. After all this, I decided to look around for more higher end brands- Shiseido was an option but I found their pencils too soft, and Clarins had a great formula but didn't have a colour that worked for me. However when I heard about the Shu Uemura Hard Formula Eyebrow Pencil, I just couldn't resist and now it is in my hands!

Shu Uemura Hard Formula H9 Eyebrow Pencil in Stone Gray
The Shu Uemura Eyebrow Pencil is unique- the first thing you notice is the strange tip! It is carved into the shape of a Japanese sword, and because of this shape, it makes it so easy and simple to use. The angle is perfect and follows the shape of the brows very well. The only qualm is that it is difficult to sharpen at home (especially because of its hard lead), but the great thing is you can take it into any Shu Uemura counter and they can sharpen it for you free of charge.


Shaped like a Japanese sword
Even though going to a store to get the pencil sharpened may sound like a hassle, the Hard Formula H9 is what it is called- a hard formula. This makes it last so long and it doesn't wear down fast. I have read reviews where people have had their pencil sharpened every 2-3 months, and that is with using it everyday- so it definitely lasts. Just to add as well, this pencil has so much product, and the length of it is 17.5cm which is definitely longer than your regular brow pencils. Another advantage of a hard formula is that you will have a natural looking brow that isn't too dark looking. The special thing about the Shu Uemura Eyebrow Pencil is that it only releases the colour pigment when it interacts with the oils in the brow hairs, so trying to swatch it on bare skin proves to be difficult.

Multiple strokes of the pencil shows up very faint, the formula needs to react with the oils in the brow hairs to work
Bare eyebrows
Filled in with Shu Uemura Eyebrow Pencil
The results are amazing! The Shu Uemura Eyebrow Pencil gives such a natural look and Stone Gray 05 is a perfect match for my dark asian hair. Many people find that Seal Brown 02 works for them, but seeing as I don't plan to dye my hair any time soon, I decided that going for the grey shade would suit me better. The brow pencil is smudgeproof and long-lasting unlike all other brow products I have used! I am so pleased with this purchase and even though the initial investment of $34 was a little high, I can see this pencil lasting for more than a year and being a great staple in my makeup collection and I have no need for any other brow product!

What brow products do you use? What do you think of the Shu Uemura Eyebrow Pencil? 


Thursday, 11 April 2013

Review: Trilogy Rosehip Oil Antioxidant+


The colder months are arriving soon, and even though it means hot chocolates, sitting in front of a fireplace (or in my case, a small electric heater) and snuggling up in bed- the harsh winds and cold weather really plays havoc with your skin. Having dry skin myself that tends to be tight and flaky at times, I really need a solution. I have been in love with rosehip oils since I first tried the Rose-Hip Vital Australian Certified Organic Cold Pressed Rosehip Oil and when it ran out, I decided to try the popular Trilogy rosehip oils. After contemplating whether I should buy the original Certified Organic Rosehip Oil or the advanced formula Rosehip Oil Antioxidant+, I decided on the latter. A few extra antioxidants won't hurt after all!


If you are a stranger to rosehip oil, you are missing out on a lot! Rosehip's potent oil is great for scars, stretch marks, ageing and dehydrated skin, and for making skin soft and supple. And for those afraid of an oil clogging up their pores and making them break out- rosehip oil doesn't do this! The Trilogy Rosehip Oil Antioxidant+ , retailing at $29.95, has super antioxidants lycopene and phytosterol in addition to the organic rosehip oil. Trilogy claims that it improves brightening, skin tone, fine lines and wrinkles, elasticity and firmness- phew, what a whole lot of claims! I was quite excited to try this especially after reading all the benefits it will have on my skin.


First thing I noticed was that it didn't have any noticeable scent, which was a surprise as rosehip oil normally has a unique fragrance! After cleansing I usually apply a few drops on my damp skin, in particular the cheeks and chin, a tiny bit on my forehead and neck. I absolutely love it as it instantly makes my dry, tight skin feel moisturised and protected, as well as super soft. I allow the oil to sink into my skin and doesn't leave a greasy residue which is great! I finish my face routine by applying moisturiser and an eye cream on top for extra hydration.

I usually have flaky dry skin but after introducing rosehip oil to my routine it has improved dramatically! In terms of brightening and skintone, I haven't noticed much of a difference, however my skin has definitely been feeling firmer and softer. I think rosehip oil will be great for everyone and is quite inexpensive in comparison to facial serums on the market who offer the same benefits!


My only qualms about the Trilogy Rosehip Oil Antioxidant+ is that the oil sometimes leaks from the dropper, but I think I may have a faulty one as Trilogy has been known for producing great droppers. Besides that, this is an amazing treatment you can use on your face that is organic and free from chemicals, providing hydration and suppleness to the skin. I will happily repurchase this as it has been a life saviour for my skin.

Have you tried rosehip oil before? Which brands have you tried?


Friday, 29 March 2013

Review: Revlon PhotoReady Perfecting Primer and Eye Primer

I had never really been interested in trying makeup primers, even though I know they can really make a difference to how long your makeup lasts and how it looks. Perhaps it's because I don't know what primer to go for, as I only know a handful of brands which have affordable primers (I'm not willing to spend a lot on primer for some reason) or maybe it's due to laziness. However I've been lucky enough to receive these Revlon primers for free- the PhotoReady Perfecting Primer and PhotoReady Eye Primer and Brightener.


I have always considered Revlon as a higher-end "drugstore" brand, and this is also reflected in their prices. Prices for makeup here in Australia are exorbitant, ridiculous, whatever you would like to call it! The Perfecting Primer and Eye Primer and Brightener retail for $29.95 and $24.95 respectively- which to all your fellow American bloggers may find crazy! I am so jealous at the inexpensive makeup overseas. Alright that is enough rambling for now!


Revlon PhotoReady Perfecting Primer $29.95

A primer that applies on smoothly and effortlessly, this lightweight Perfecting Primer is described to create a perfect canvas for makeup, and softens the skin by reducing the appearance of pores and fine lines. Packaging wise, I like this primer- the glass bottle feels solid and of good quality, and the easy to dispense pump doesn't hurt either (as opposed to L'Oreal Paris' Base Magique Smoothing Primer which is in a jar which isn't a very hygienic way to use a primer!).

On first application I found this primer to be greasy, but only afterwards I realised it wasn't the primer itself- it was all the other products I had on; my rosehip oil, moisturiser and sunscreen! On another attempt, the primer melted into my skin which was amazing! I can't really comment on its minimising pores and fine lines capability as I don't have either of those! I couldn't really feel or see a significant difference between using it and not using it under foundation, however that isn't to say there wasn't a difference. It probably did make my foundation last longer, but I just didn't realise it. A nice product but doesn't really "wow" me, and as a result I don't use the Revlon PhotoReady Perfecting Primer very often.


Revlon PhotoReady Eye Primer and Brightener $24.95

I've been using this eye primer daily, but seeing as I haven't used any other eye primers before, I don't have anything to compare it to! Claiming to be a perfect base for the eyelids, this PhotoReady Eye Primer and Brightener can be used to prime the eyelids and under the eye, as well as brighten anywhere on the face. The brush applicator makes the product easy to apply, although dispensing it is sometimes difficult- one twist isn't enough for any primer to come out, but a couple more makes too much come out! I personally like to apply it using my fingers as I find I can get more control over its application. Instead of eyeliner pencils dragging on my eye sans primer, the PhotoReady Eye Primer and Brightener allows eyeliner to glide on smoothly and effortlessly! Any eye makeup stays on for longer too, and eyeshadows look more vibrant. As a brightener, I'm not a fan. It doesn't really do much, and when it isn't blended out properly, it looks terrible. I would rather use other products as a highlighter- even a light coloured eyeshadow would work better! However as an eye primer, this is excellent!

L-R: Revlon PhotoReady Eye Primer and Brightener, Revlon PhotoReady Perfecting Primer
L-R: Eyeshadow without primer, eyeshadow with Eye Primer, eyeshadow without primer, eyeshadow with Perfecting Primer
If you look carefully, you can tell there is a difference when applying the eyeshadow with and without primer! Both primers work amazingly under eyeshadow, and you can definitely tell that it looks more pigmented and vibrant. What I also love about these Revlon primers is that they are oil free, talc free, fragrance free and paraben free which will give you an extra peace of mind! Maybe I should give my Perfecting Primer another chance after all...

After I use up my PhotoReady Eye Primer and Brightener, I'm not sure what eye primer I will go for next. I've heard that Urban Decay has a great formulation for its primer, but I have no clue where to get it (in Australia) and how much it would cost! If anyone could help me with that it'll be much appreciated :)

Have you tried any of these Revlon primers? Do you use primers, and if so, which ones?